Connecting Quickbooks
This guide walks you through the QuickBooks setup process. After following these steps, your Diversdesk account will be fully integrated with QuickBooks, allowing you to record transactions from any payment method.
If you prefer a video tutorial, we have added video Tutorials at the bottom of this page.
1. Create a Quickbooks Account
If you don’t have a QuickBooks account yet, you’ll need to create one on the official Quickbooks website.
Once your account is set up, you can continue to step 2.
2. Connect Your Quickbooks Account to Diversdesk
Navigate to app.diversdesk.com/connect.
Click Login and sign in with your Diversdesk credentials.
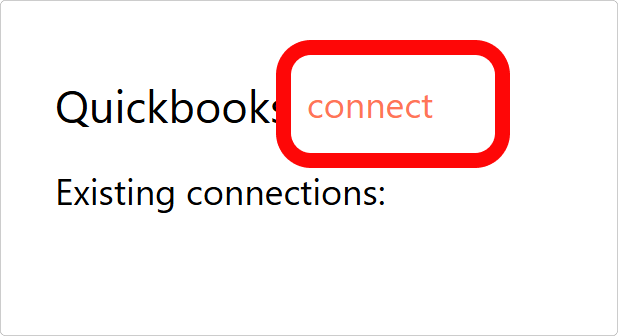
Once logged in, you’ll see your Connections page. Click the ‘Connect QuickBooks’ link to begin.
If you haven’t already logged in in step 1, you can now login to your quickbooks account.
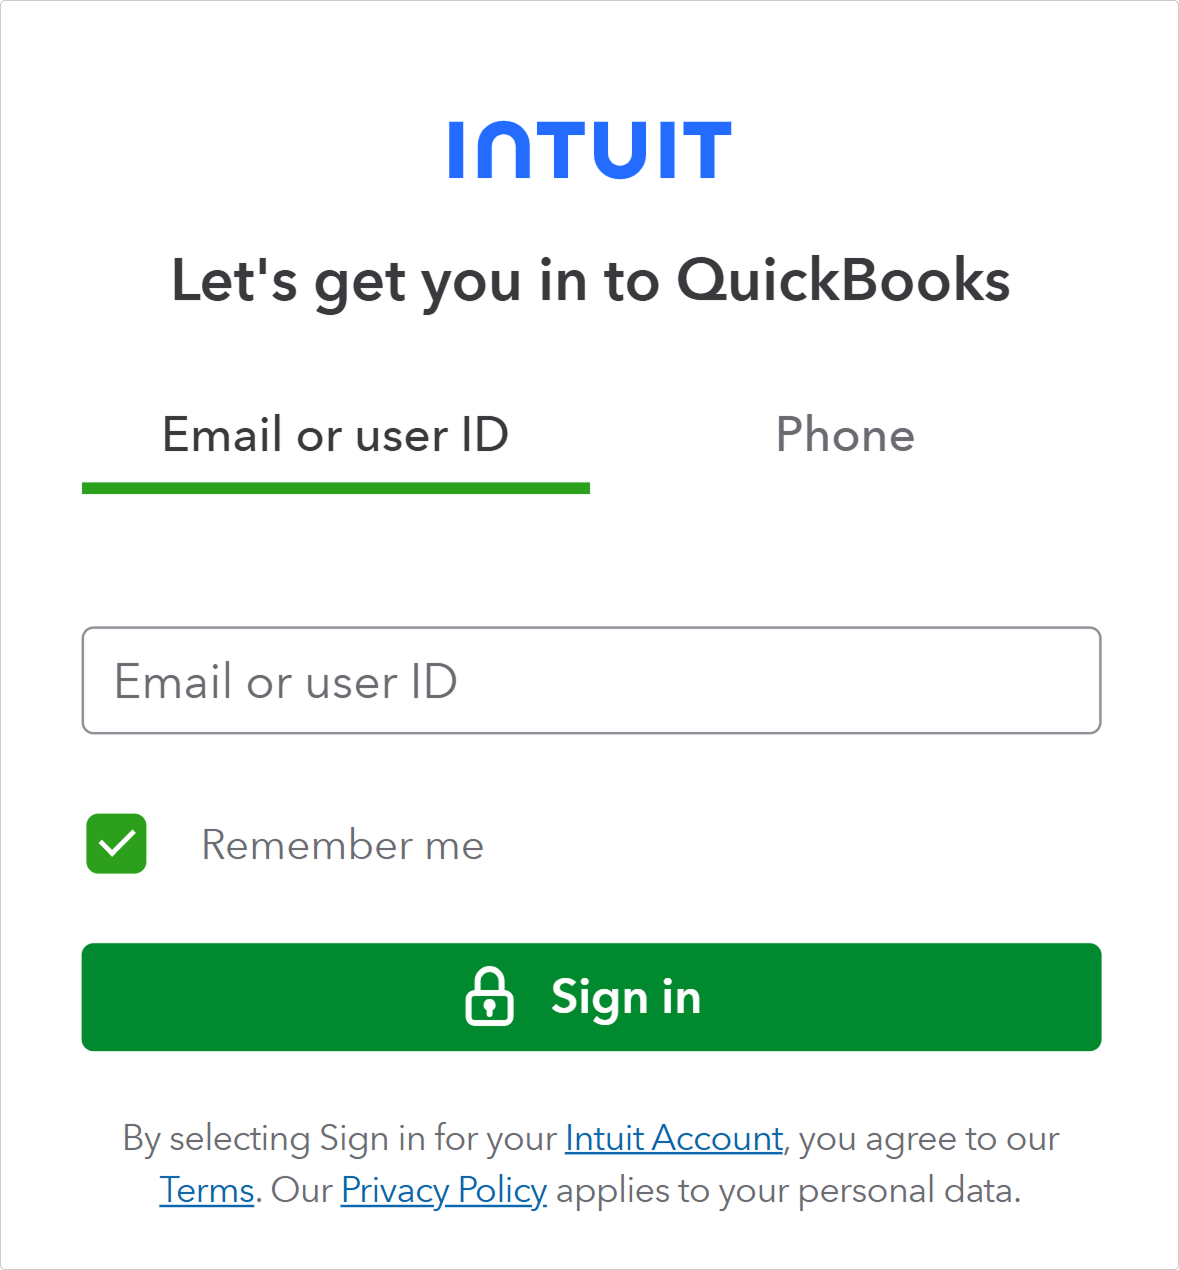
After you sign in, Diversdesk will establish a connection between your QuickBooks and Diversdesk accounts.
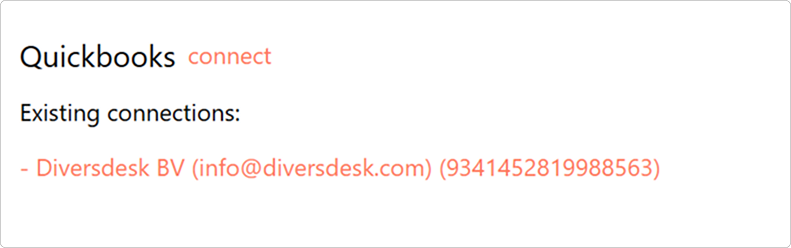
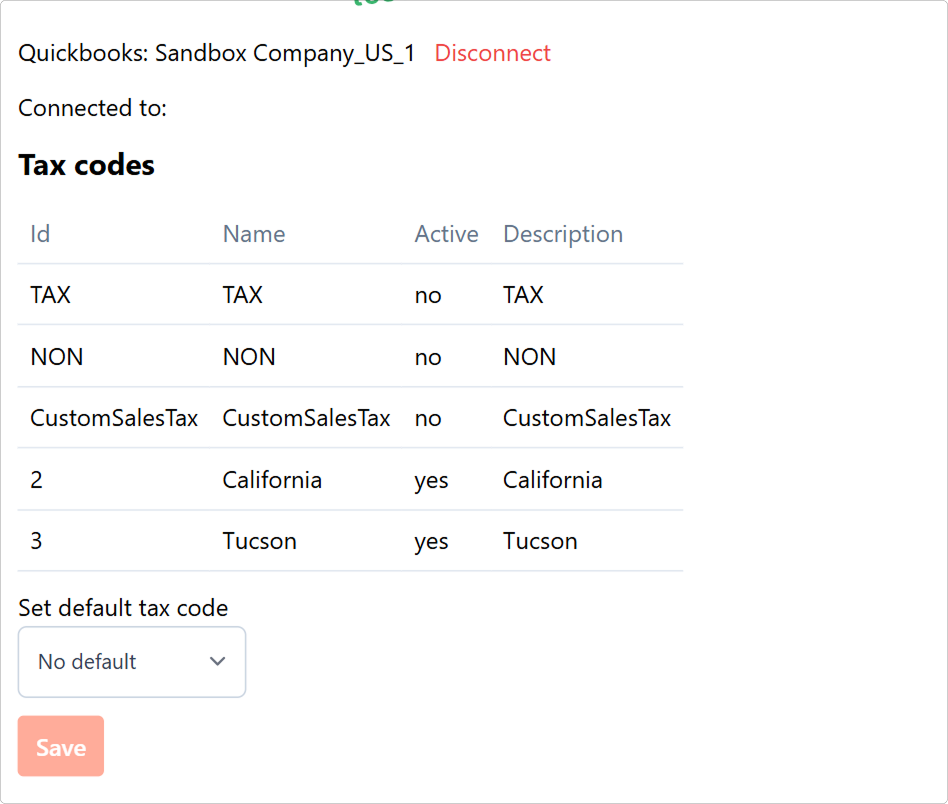
Once connected, your active QuickBooks connection will then appear on the page.
Below you’ll see the generated tax codes. You can also set a default tax code on this page.
You’re all set! You can now close this window and return to your Diversdesk workspace at {yourcompany}.diversdesk.com.
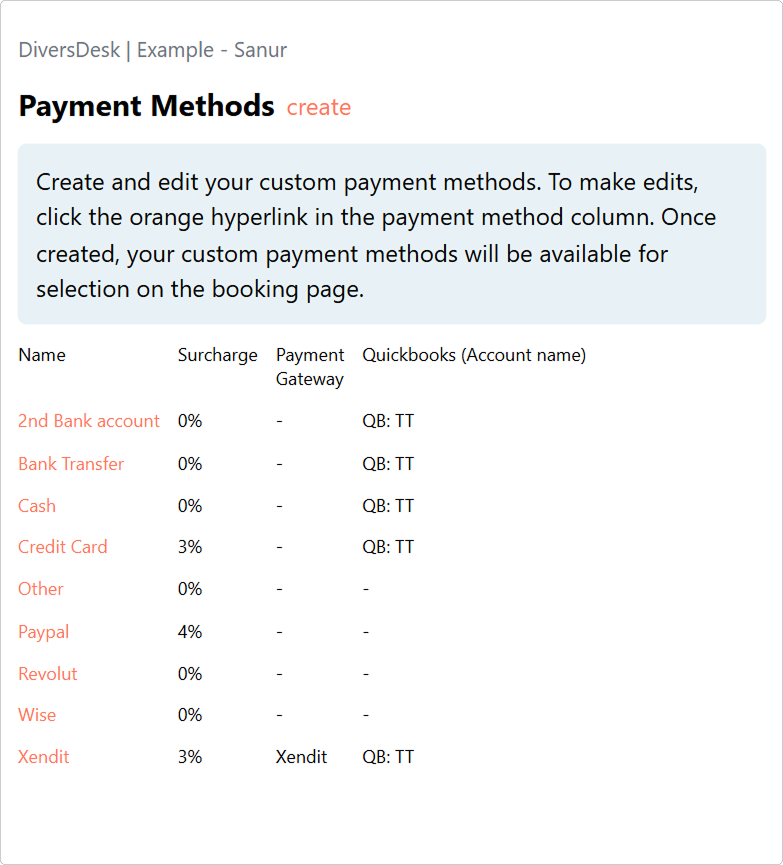
3. Connecting Quickbooks to Your Payment Methods
Back in your Diversdesk environment, you can assign the QuickBooks integration to specific payment methods by navigating to Menu > Settings > Payment Methods.