Creating Customer Onboarding Journeys
Creating an onboarding Journey
To successfully create an Onboarding Journey we will walk through a few steps. Below you’ll find the steps for best practice.
1. Setup your Custom Waiver
We took the liberty of entering the official waivers of your certification organisation. If you don’t wish to use any additional/custom waivers outside the ones made available from your certification organisation, you can continue at step 2.
Create a Custom Waiver
Creating your custom waiver can be done through the following steps.
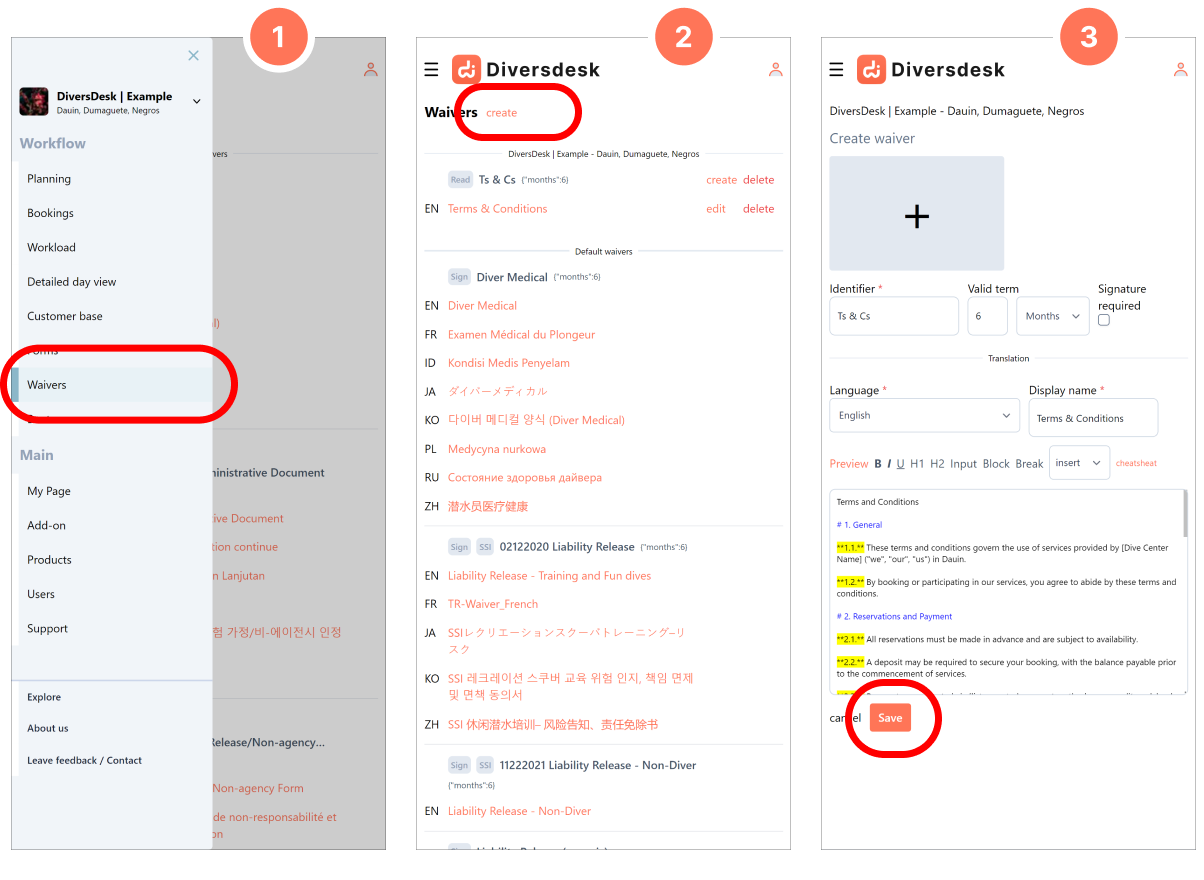
Navigate to the 'Waivers' page through the hamburger menu at the left top of your screen.
Through the 'create' hyperlink at the top of the page, you can create a new waiver. Editing can be done through the Edit hyperlink behind an existing waiver.
Fill the required fields to save your custom waiver. By toggling in-between Preview and edit you can obtain a quick snapshot of your waiver
The following fields are available to you when creating or editing a custom waiver:
Identifier
Umbrella name for this waiver. This is used for you to recognize the waiver, regardless the different names per language ‘Display name’ used.
Valid term
The period a signed waiver remains valid or is open for signing to your customer.
Signature required checkbox
Determines if this waiver is shown as a seperate signed waiver, or embedded into your registration form as a tick box.
Language
The language used for the waiver you’re creating
Display name
The dedicated name for the language you’re entering. This is the name that your customers will see.
Text input field
The actual waiver text can be entered here. through the available cheatsheet you can see what ‘markdown’ text formatting options can be made.