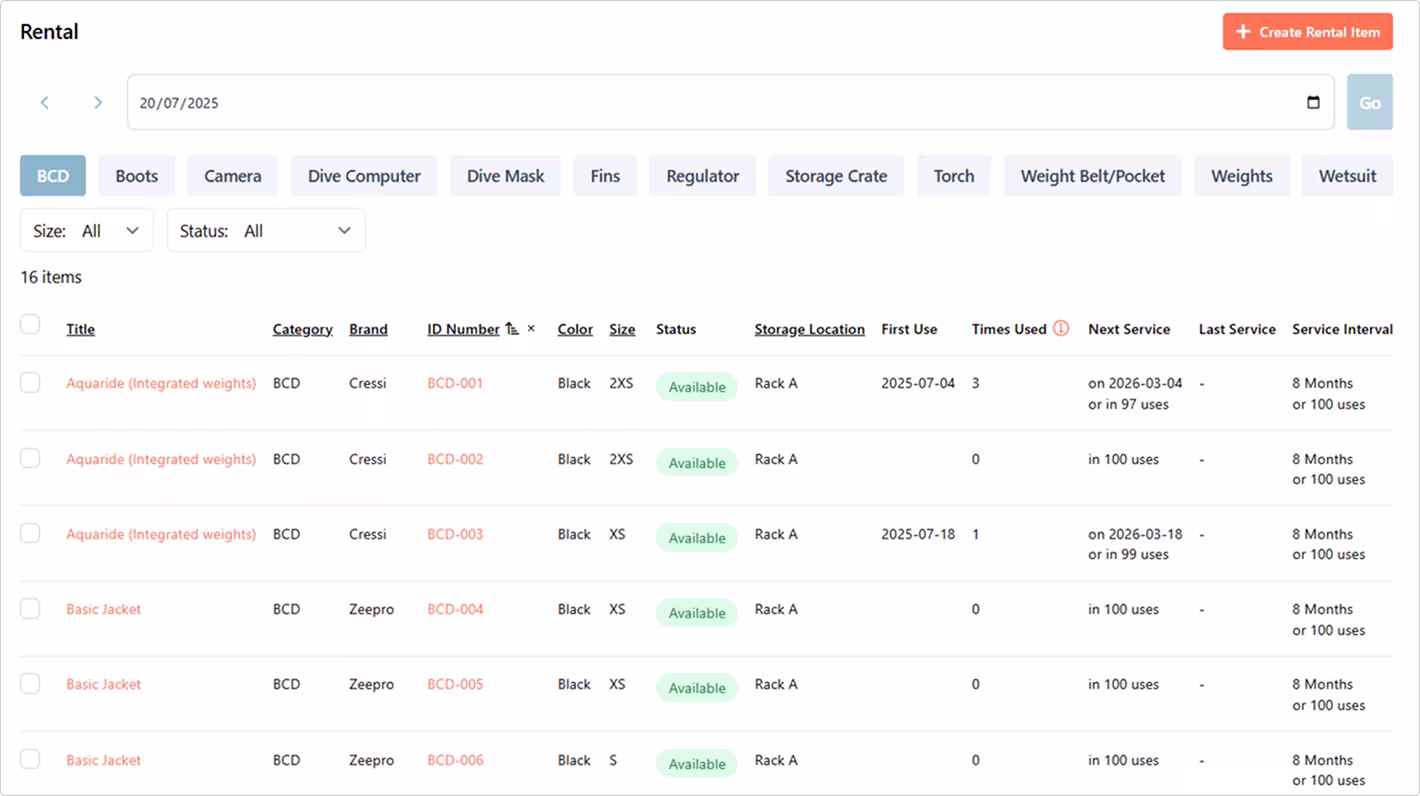
Rental Items
The Rental Items page shows you an overview of all your entered rental items. On this page you can:
- Manage stock & availability
- Perform gear checks
- Track usage & services
- Add actionable notes
Entered rental categories will automatically appear as filter buttons in the top of your screen.
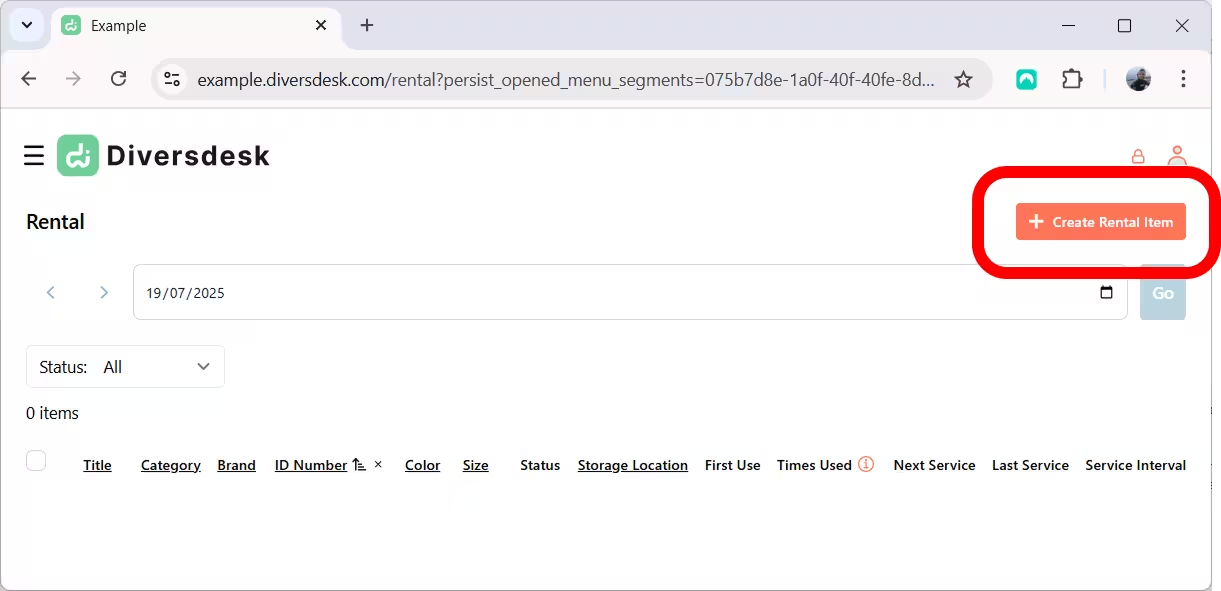
Create a Rental Item
To create a rental item, click the ’+ Create Rental Item’ button in the top right of your screen.
This opens a side-panel where you can enter all the rental item’s information. Here’s an overview of each entry field:
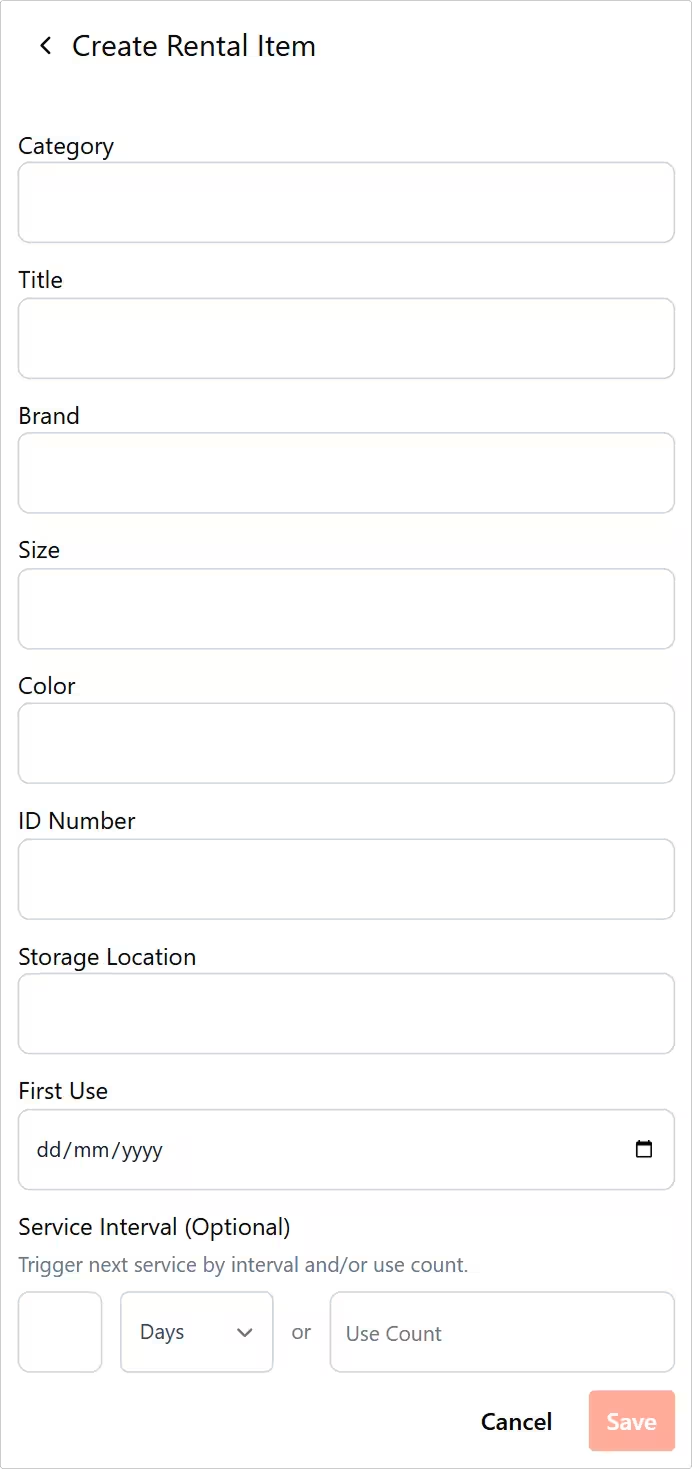
Category: Rental category name. E.g. BCD or Wetsuit.
Title: You can use this field to add either a type or descriptive title that helps you recognize the rental item. E.g. Basic Jacket or Aquaride (Integrated weights).
Brand: The Brand of your rental Item.
Size: If applicable, you can fill the size of your rental item (optional).
Color: Color of the item (optional).
ID Number: Unique ID Number that's linked to your rental Item. For easy recognizion, we recommend to embed the category in this number. e.g. BCD-001, WS-011, REG-002.
Storage Location: Location where the rental item is stored. e.g. Rack A or Box 1.
First Use: This field is automatically filled with the date the item is first rented out. If an item was already in use before entering it in your backend, you can fill the start date here.
Service Interval: If applicable, you can set a service interval here. Either a set date and/or number of uses. The service interval is activated as soon as one of these conditions (date or number of uses) is met.
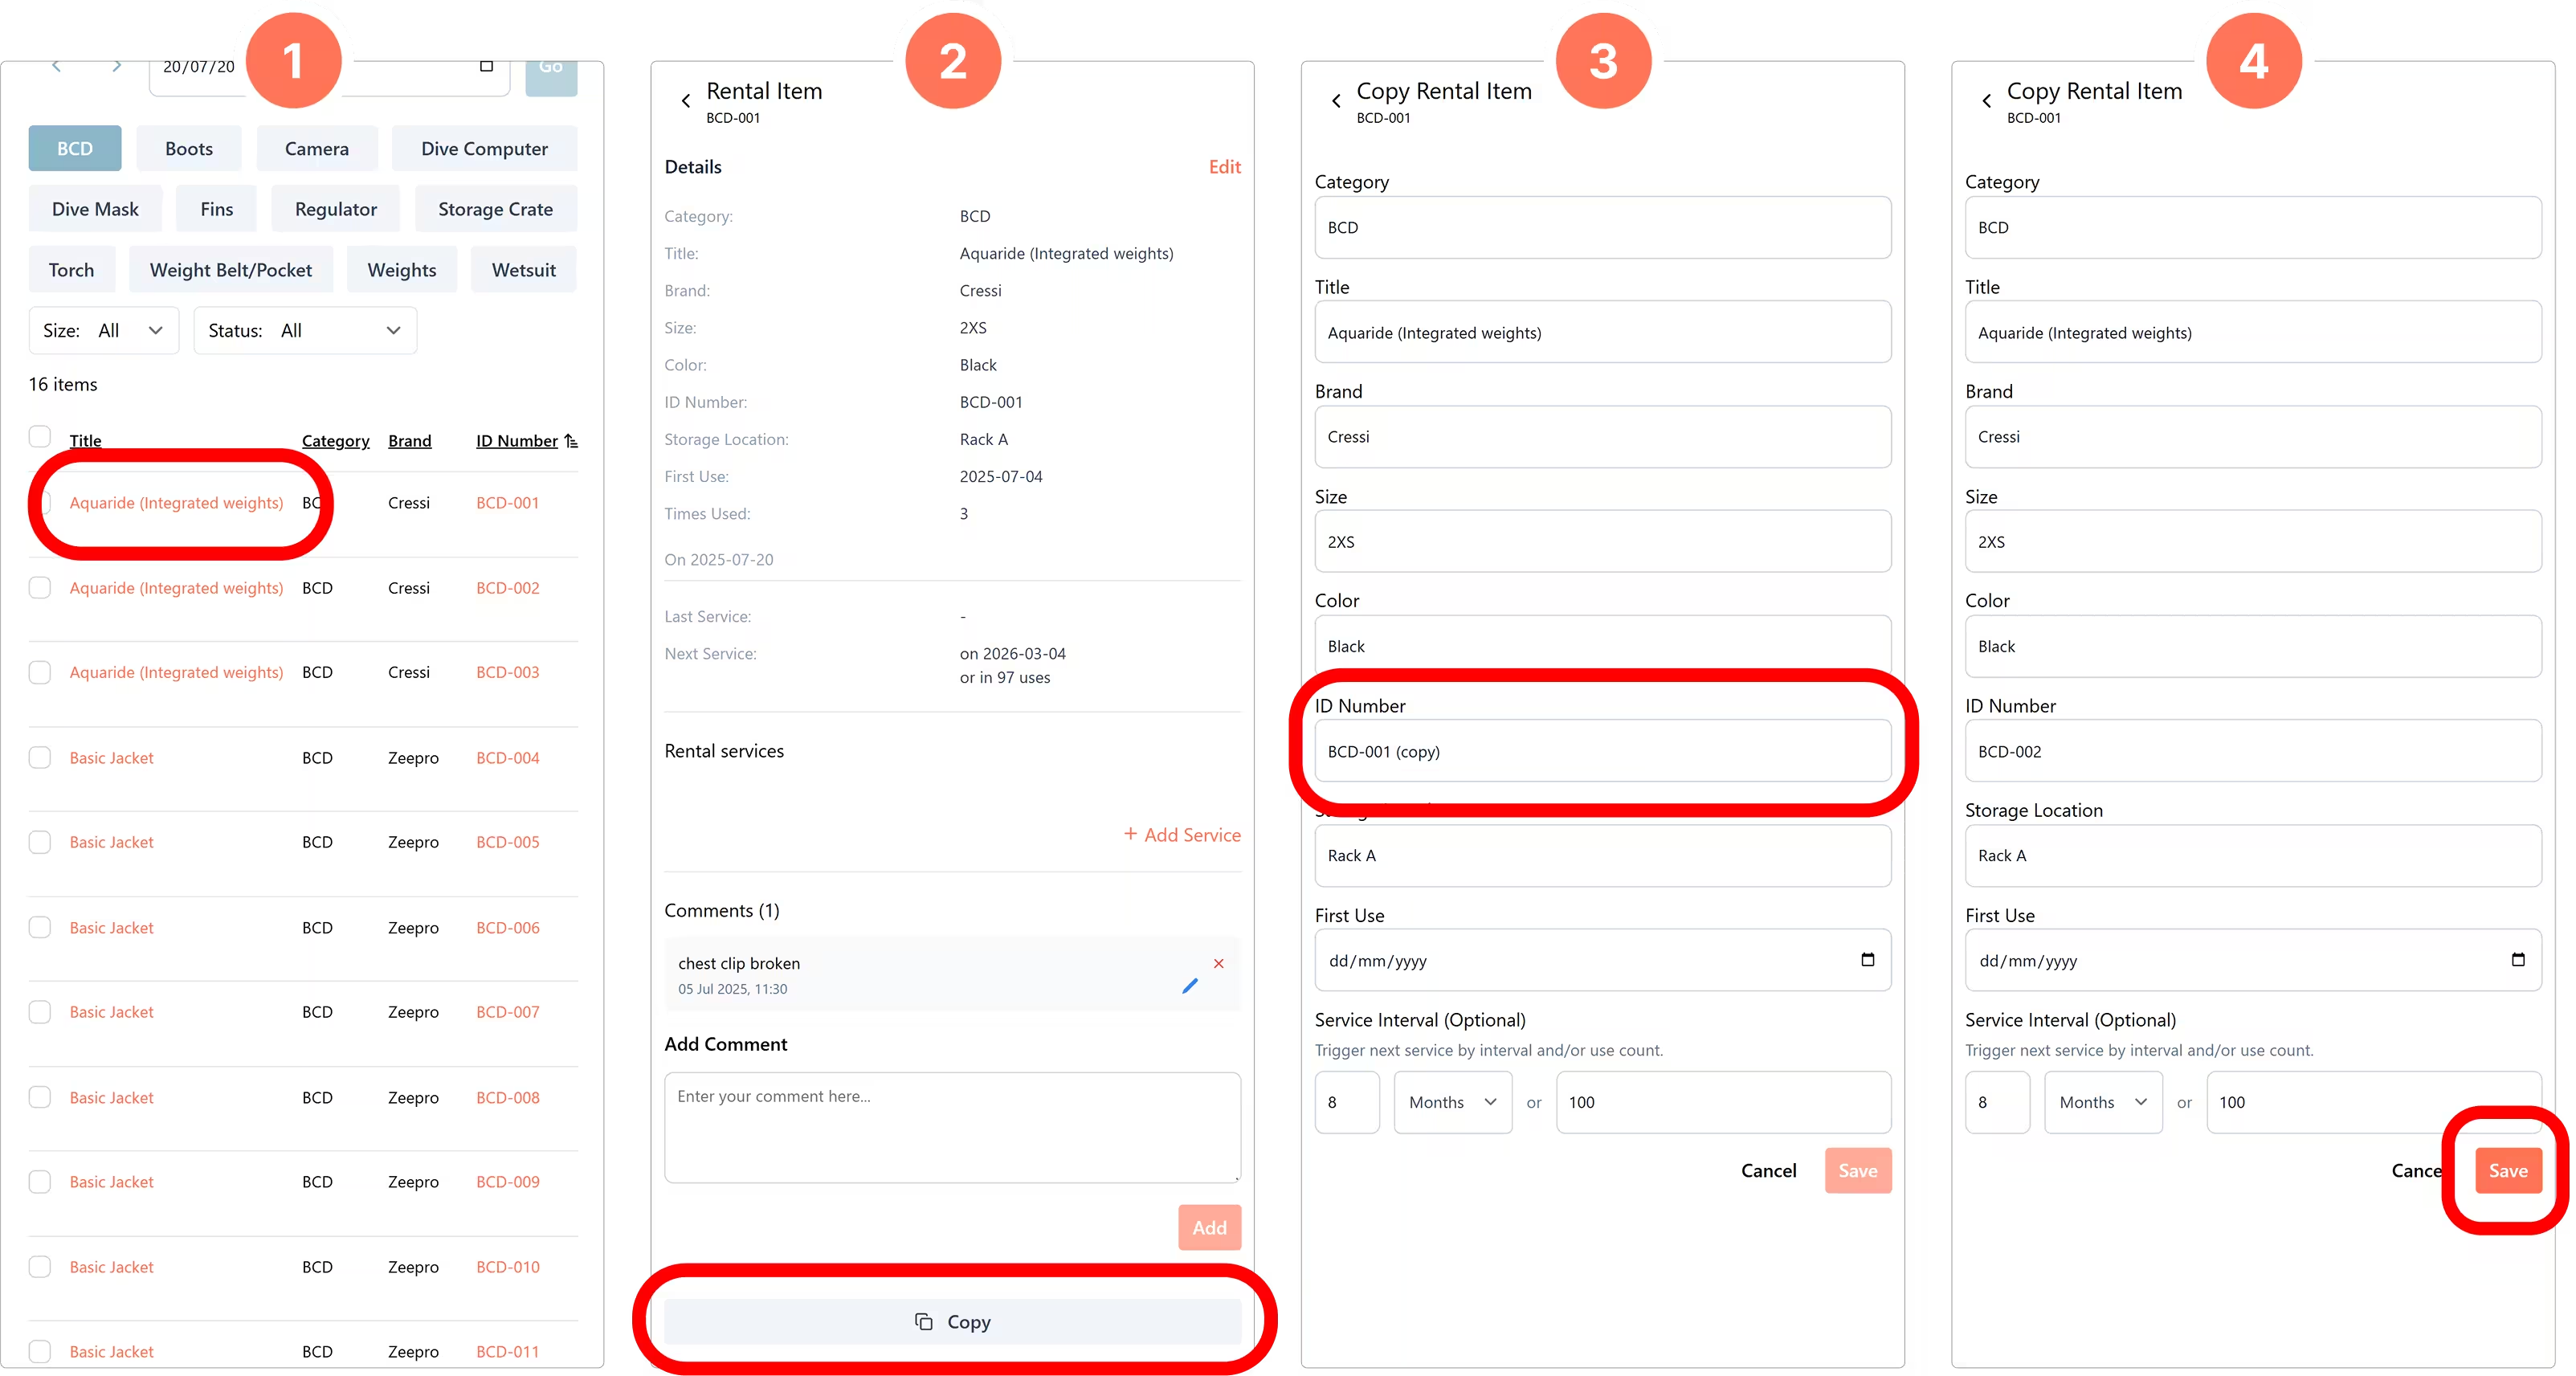
Copying a Rental Item
To speed up rental items entry, you can copy an existing rental item. When copying this, the ID number is duplicated with an added (copy) text behind the existing ID. When you’re entering similar items, this will signifcantly speed up the entry process.
Tab/click on an existing rental item to open its details.
Press the Copy button to duplicate all its information.
Change the unique ID/URL for the new item.
Save the new rental item to add it to your inventory.
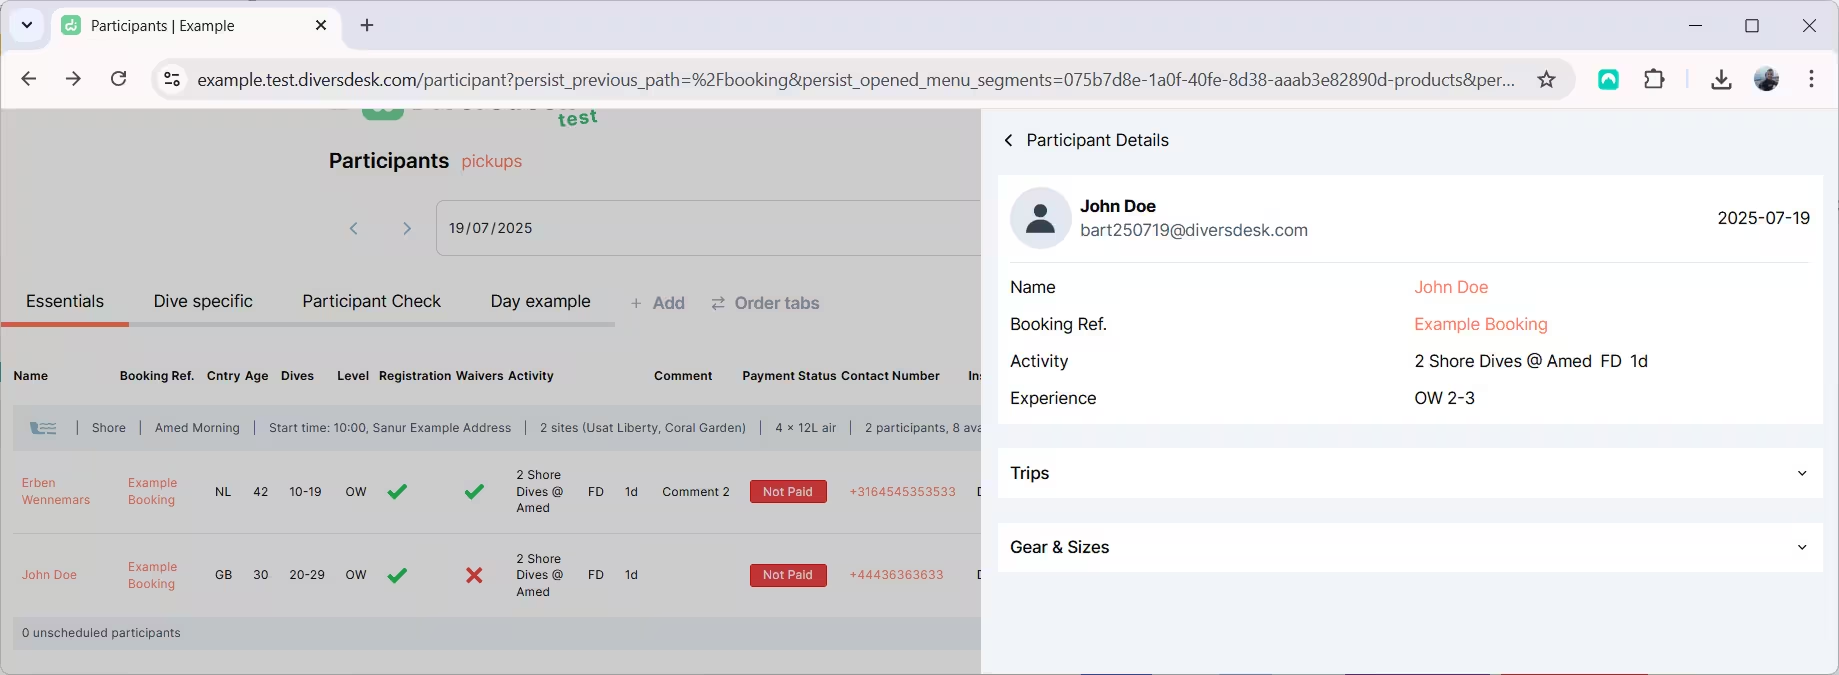
Assigning Rental Gear
Assigning Rental gear to your customer can be done from the Day Manifest page. Clicking on the customer name will open a side panel with Customer information, trip assignment and information and the option to assign rental gear.
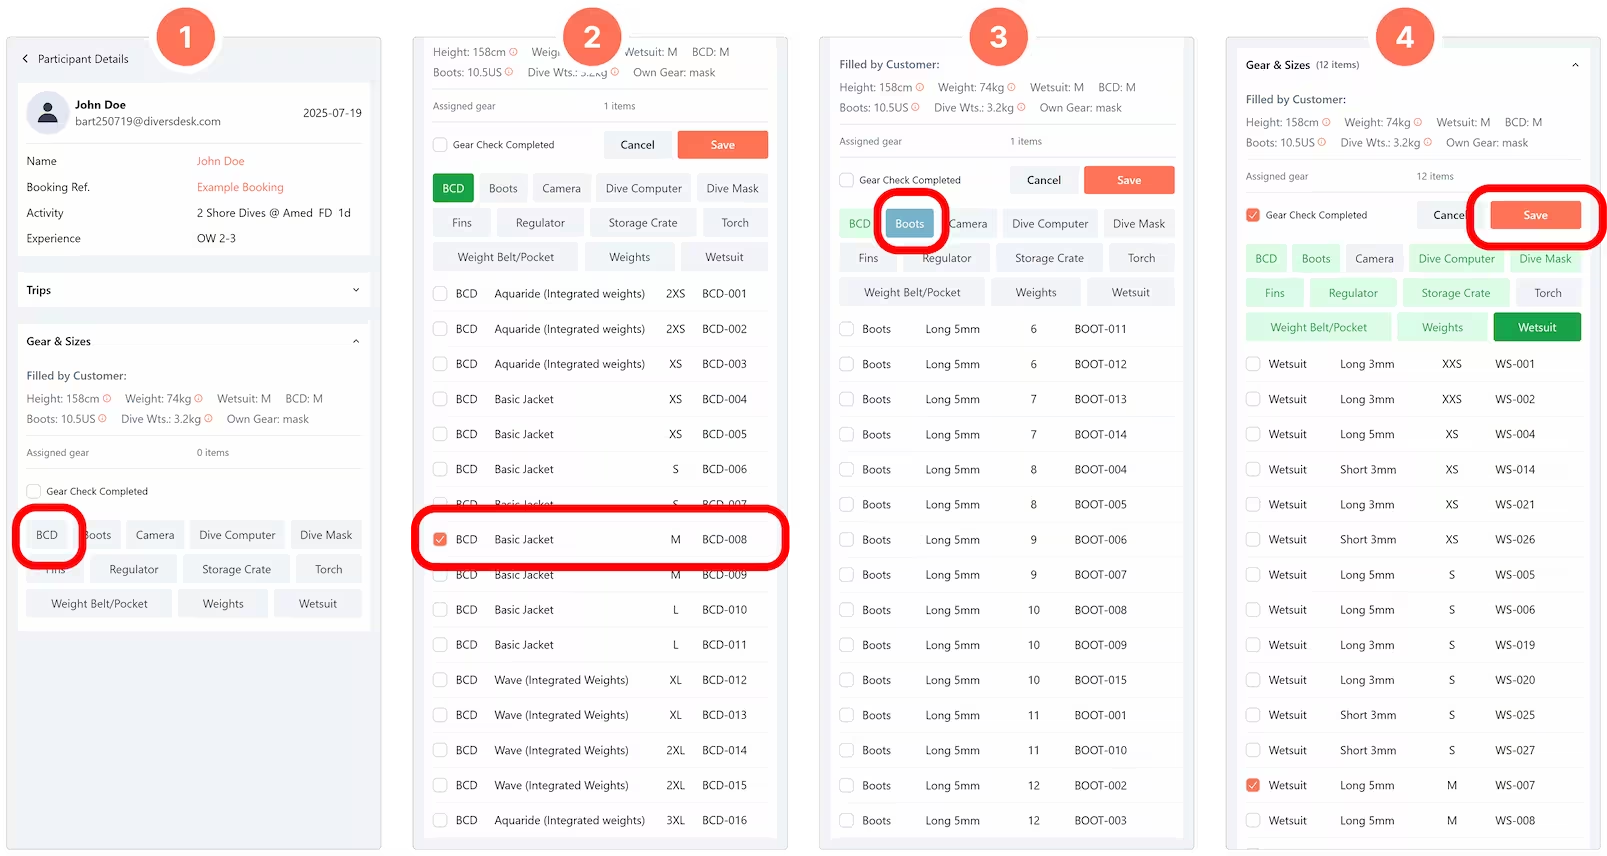
From the expanded Gear & Sizes section, you can start assigning gear to the selected participant. The sizes filled in the registration form are summarized above the rental categories for easy reference.
Select one of the categories to start assigning gear.
Select a retail item from the drop-down list.
Select the next rental category you want to assign.
When finished, mark 'Gear Check Complete' and save.
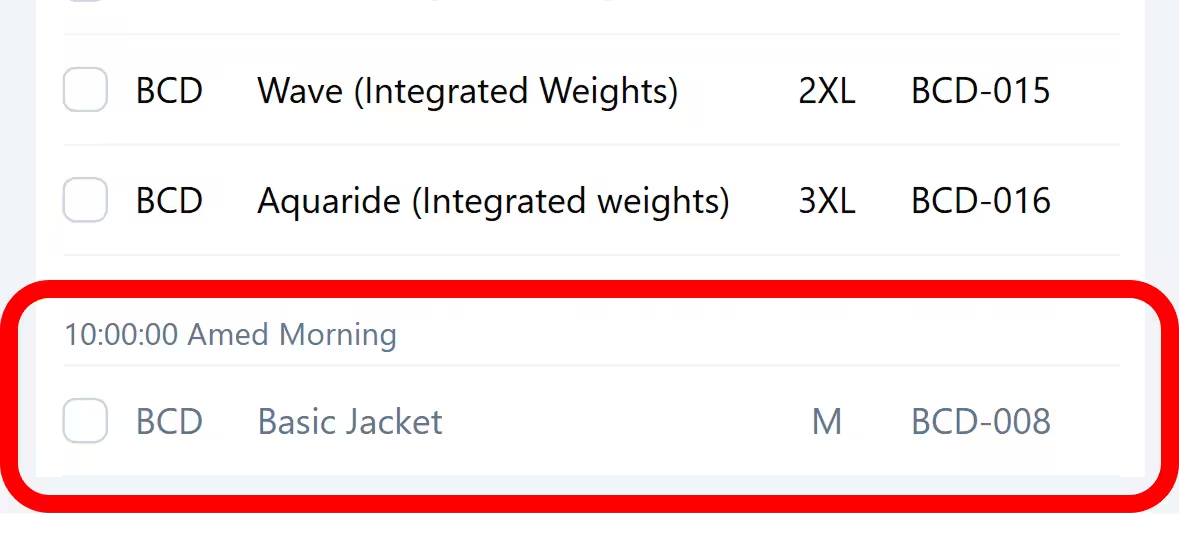
Assigned Gear indication
When selecting gear, any items already assigned for the selected day will appear at the bottom of the drop-down list. This view also includes the trip information for that rented gear, helping you quickly see if the item can be rented out a second time that day.
Gear Check Status
If for whatever reason you can’t complete the gear check, you can leave the ‘Gear Check Complete’ check box open to continue the assignment at a later stage. At a higher level, you and your colleagues can see there’s gear assigned to this customer, but the gear check hasn’t been marked complete.
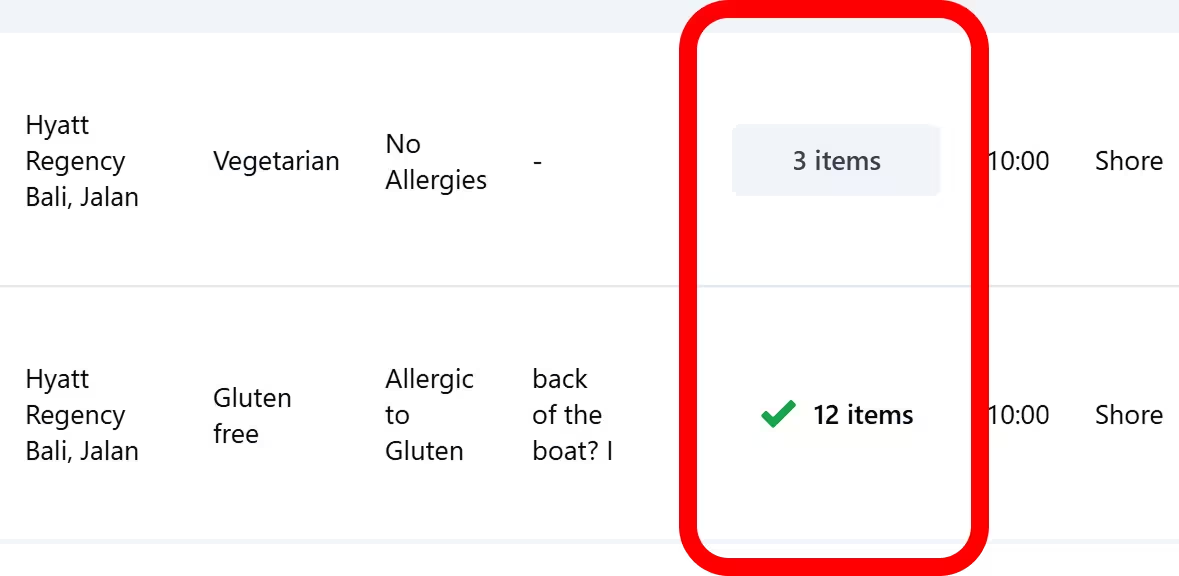
The image on the left displays the gear check column on the Day Manifest page. The bottom check is complete, whereas the top participant has assigned gear but the check is not yet marked as complete.
Adding Actionable Notes
Adding actionable notes can be done from the rental items page, by pressing on the hyperlink of one of the rental items in the title column. This will open a side panel where you can view and add notes.
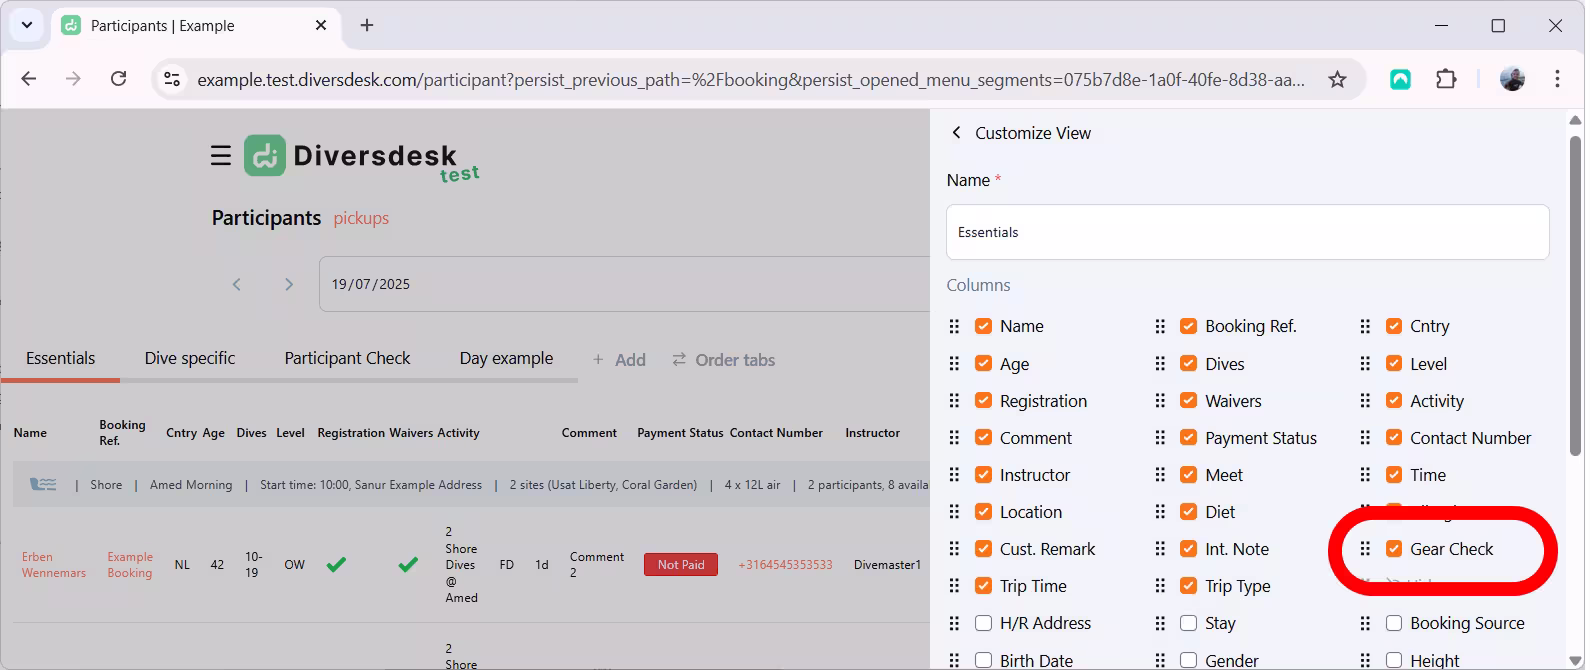
Adding the Gear Check Column
To add the Gear Check column to the Detailed Day page, just click the ‘Customize’ button in the desired tab. From there, find and select the ‘Gear Check’ checkbox, then press Ok to save your view.