Bookings
This section explains how to work with your bookings overview and how to manage an individual booking in detail.
Booking Page (Individual Booking)
Section titled “Booking Page (Individual Booking)”When you open a specific booking from the bookings overview page, this is the interface you see.
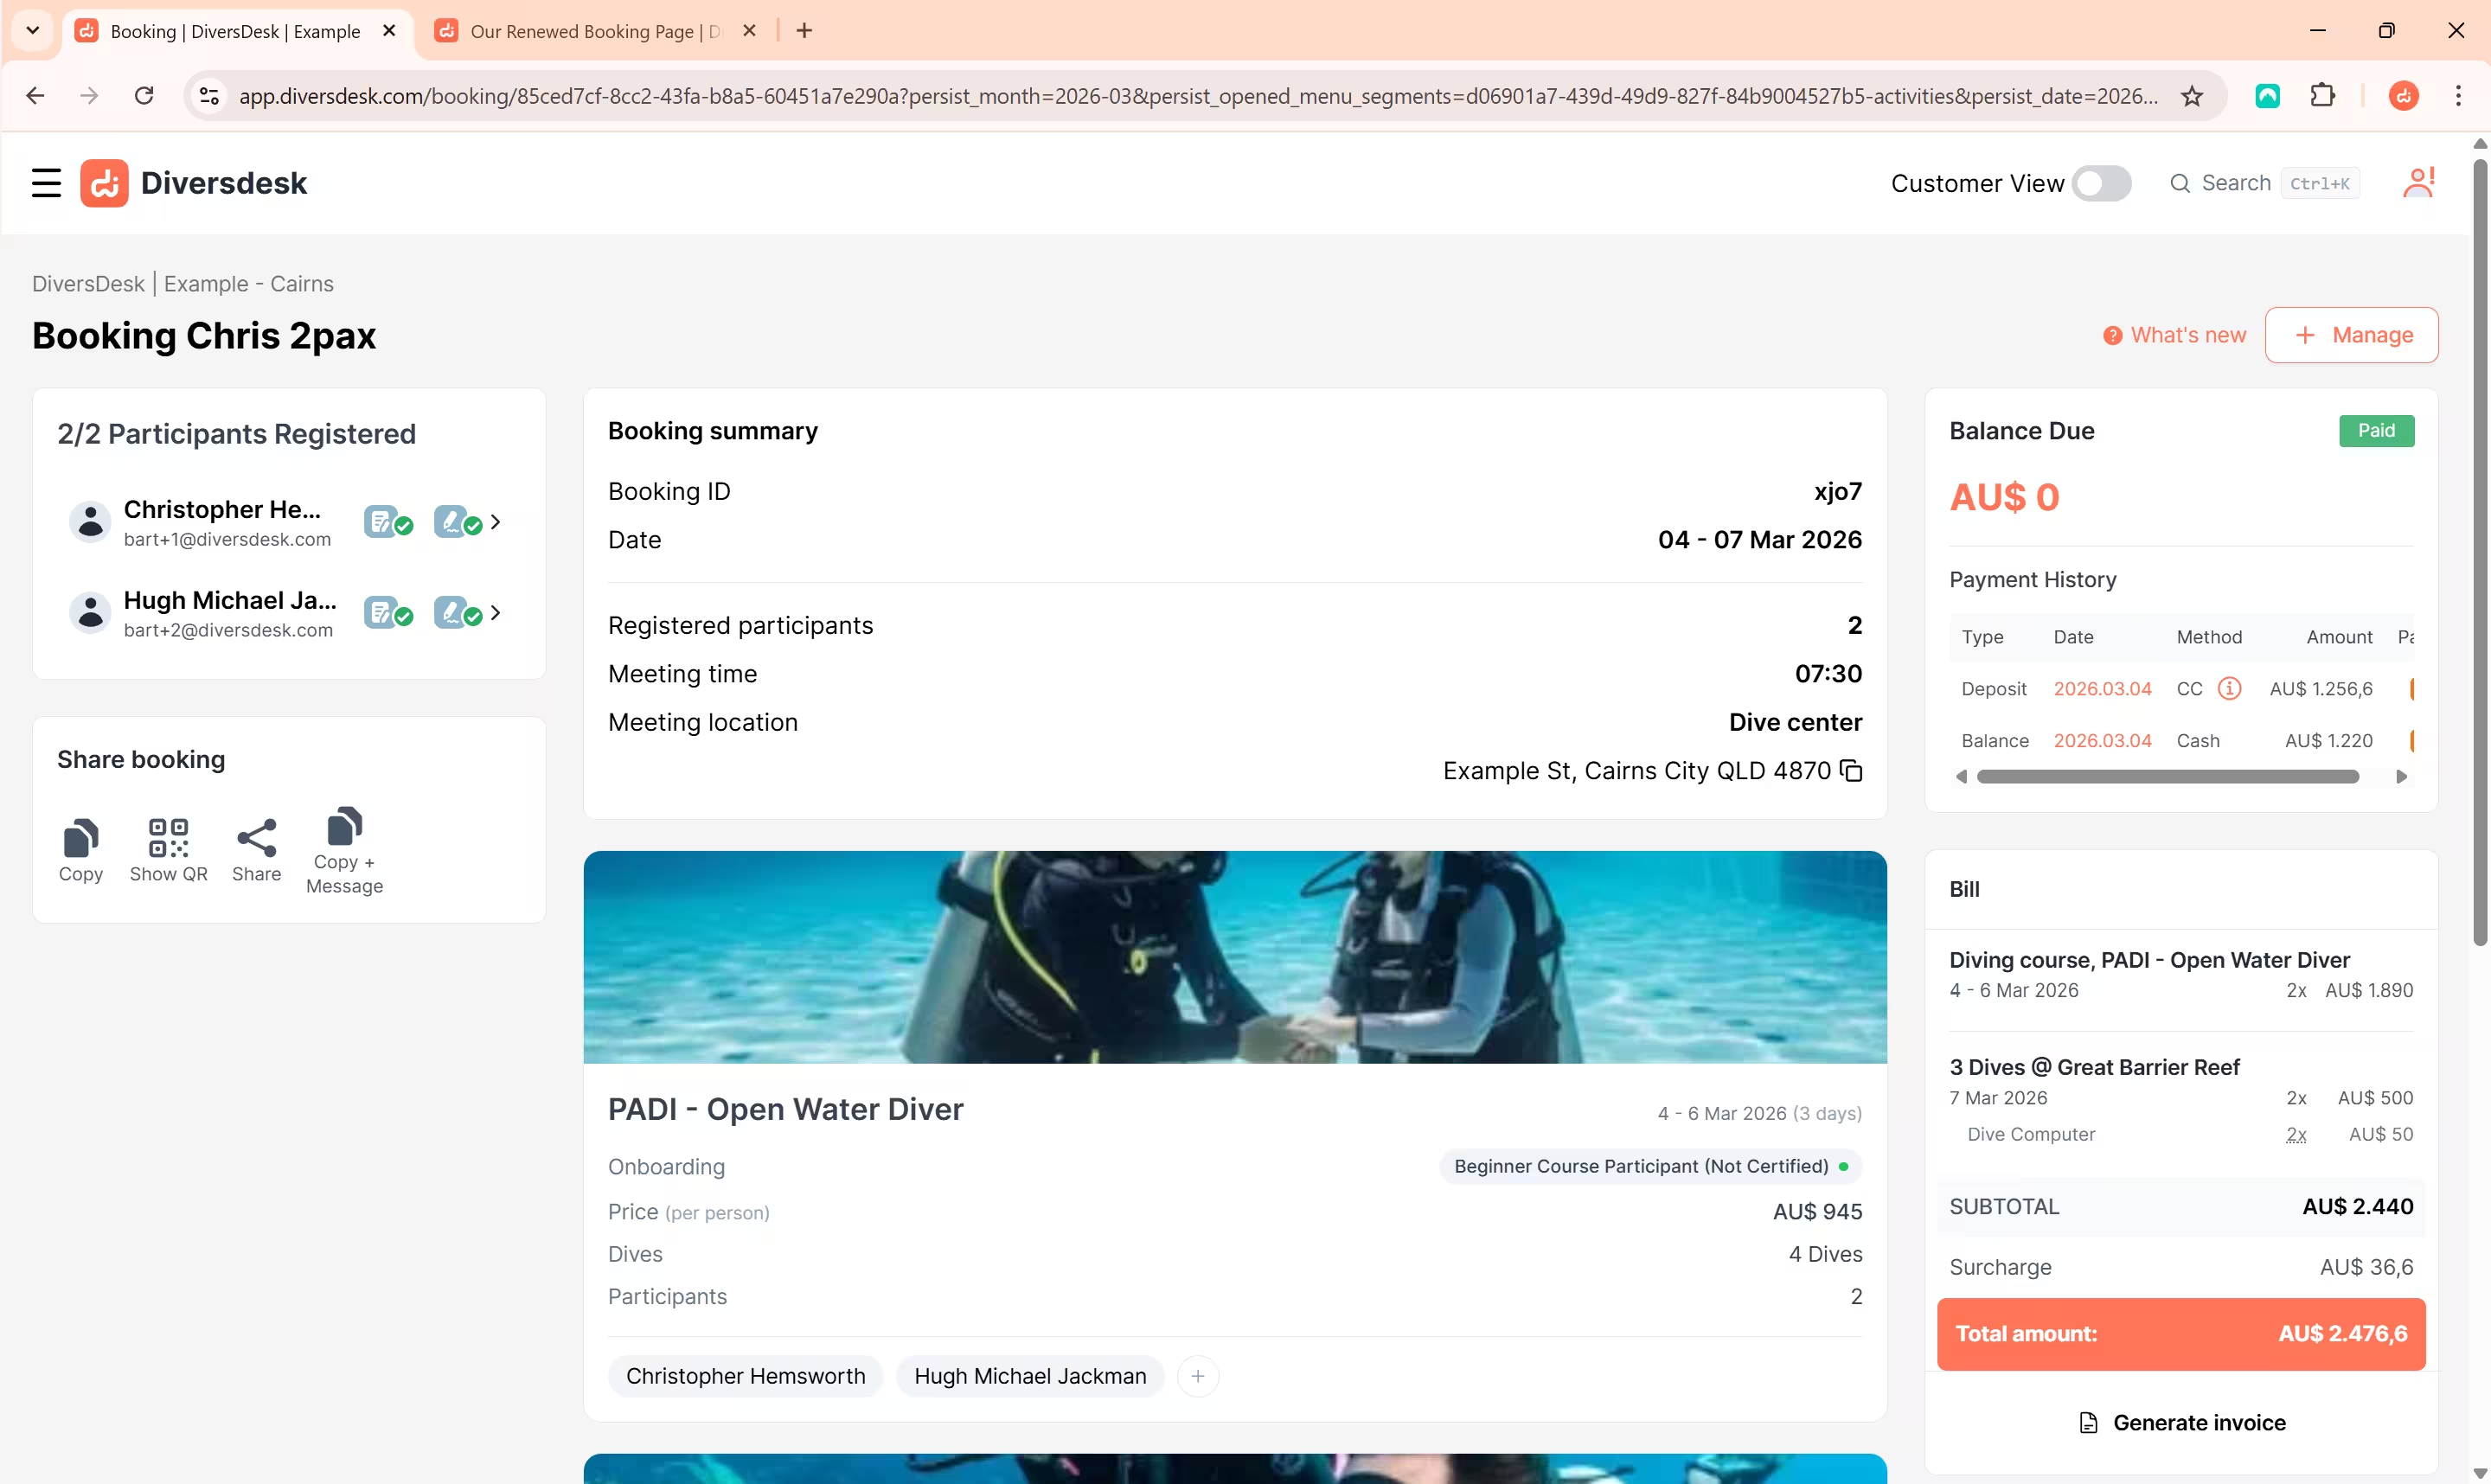
Everything related to a guest’s visit lives in one booking. You can adjust the activities, retail items, accommodation, and participants that make up the booking as the guest’s plans develop.
Architecture
Section titled “Architecture”Left Panel
Section titled “Left Panel”The left panel displays the participants or guests for the booking, along with booking share options.
Right Panel
Section titled “Right Panel”In the right panel, you’ll find billing and payment information. The top section prominently displays the outstanding balance and a payment ledger with full history.
As before, you can generate invoices here that will automatically lock the booking for consistency.
Middle content section
Section titled “Middle content section”The middle section features a summary card at the top with all activities listed below. If items from different segments are added to the booking, navigation buttons for each segment will appear automatically.
Navigating the Individual Booking View
Section titled “Navigating the Individual Booking View”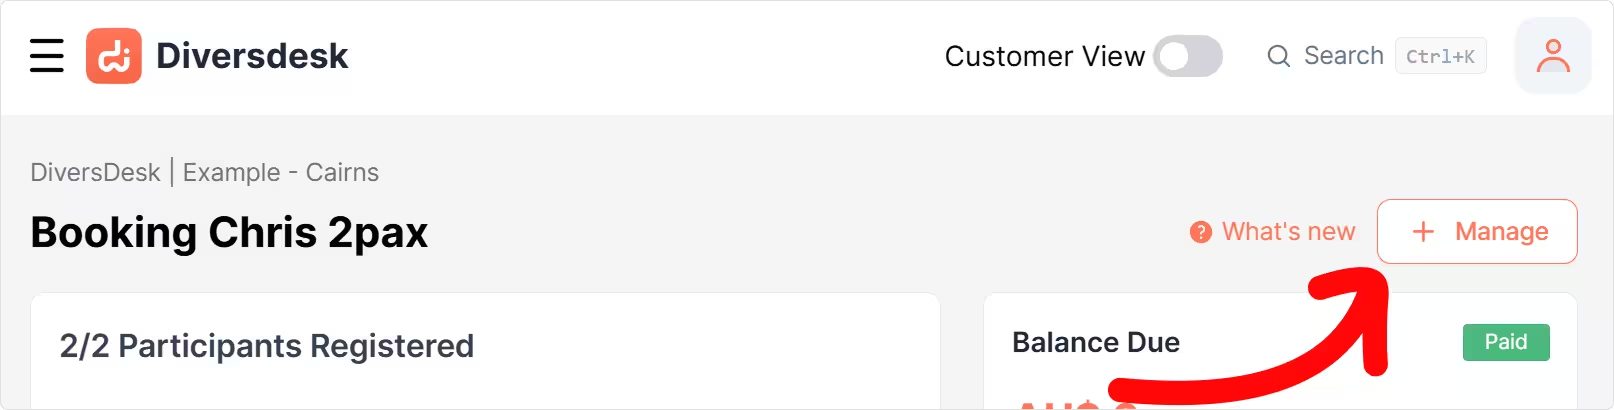
⚡ Quick-Action Button
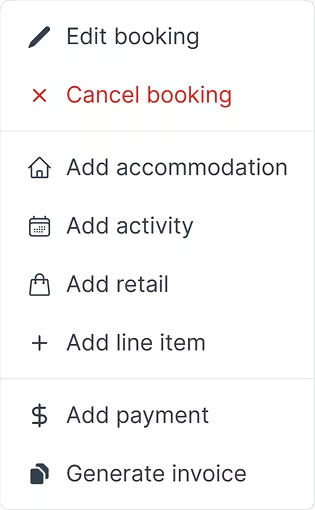
The +Manage button gives you a single, powerful point of control for actions inside the booking. You can add activities, accommodation bookings, and retail items, as well as manage payments and generate invoices, without chasing separate action links across the page.
📝 Streamlined Card Editing
We’ve removed the clutter of individual menus on activity cards. Now, simply click on any card to open a dedicated side panel where you can manage all item-specific details in one view.
Need to make broader changes? Selecting Edit Booking from the +Manage button opens a side panel where you can oversee the entire booking. From here, you can also jump into the individual activity or accommodation cards at the bottom of the view to make item-specific updates.
Actions
Section titled “Actions”Schedule an Activity Again
Section titled “Schedule an Activity Again”Open an activity card and select Schedule again in its side panel. Diversdesk automatically schedules the activity for the next day and initially connects all participants from the original activity.
Before applying the new schedule, use the Connect participants step to adjust who joins, for example when not everyone continues on the following day.
View an Activity in Planner
Section titled “View an Activity in Planner”Select View in Planner from an activity’s side panel to open the Planner on day one of that activity. The Activities tab is selected, the relevant activity is expanded, and other activities remain collapsed for a clear view.
Change the Duration of a Fixed-Price Activity
Section titled “Change the Duration of a Fixed-Price Activity”Changing the duration of a fixed-price activity does not update the price of that activity. The activity price is per person and is only affected by adjusting the number of participants participating in the activity. This is especially useful for multi-day trips, where you may need to change the scheduled duration without changing the agreed activity price.
Cancel a Booking
Section titled “Cancel a Booking”Cancelling a booking can be done through the +Manage button at the top-right of the individual booking view.
Connect a Registered Participant to 2nd Activity
Section titled “Connect a Registered Participant to 2nd Activity”If one participant is already registered and needs to be connected to an additional activity inside the same booking, you can manage this from the booking page.
Open the booking, select the relevant activity or use the booking edit flow, and connect the participant to the additional item. This is useful when a guest is already registered for one part of a package or itinerary, but still needs to be assigned to another activity within the same booking.
Using one booking for this keeps participant details, paperwork, and billing together in a single place.
Add an Existing Customer to the Booking
Section titled “Add an Existing Customer to the Booking”For returning customers, you do not need to start from scratch. You can add an existing customer profile to the booking and reuse the information that is already stored in your environment.
This is especially helpful when a guest has already registered before. Their known details can be reused, and if previously signed waivers are still valid for the relevant period, no unnecessary paperwork needs to be repeated.
Use this flow when:
- A returning customer joins a new booking
- A previously self-registered customer still needs to be connected to this booking
- You want to save time and avoid re-entering customer details manually
Generate an Invoice
Section titled “Generate an Invoice”Invoices can be generated from the right-side billing panel of the booking page. This is where you review the outstanding balance and confirm that the booking is ready to be billed.
Generating an invoice creates a formal billing document and helps lock the financial side of the booking for consistency. It is best done once the booked items, prices, discounts, and participants are correct.
Before generating an invoice, make sure you have reviewed:
- The items included in the booking
- The final booking value
- Any discounts or manual billing adjustments
- The current payment status
Add or Update Payments
Section titled “Add or Update Payments”You can also manage payments directly from the booking page. This makes it easy to capture deposits, full payments, or later follow-up payments without leaving the booking.
Use the payment section when you want to:
- Register a manual payment
- Review payment history linked to the booking
- Confirm whether there is still an outstanding balance
- Keep the booking status aligned with what has already been paid
If you use online payment gateways or multiple payment methods, the booking page remains the operational place where your team checks what has been paid and what still needs attention.
Share the Booking Details
Section titled “Share the Booking Details”Each booking has a unique booking URL that can be shared with the customer or with all participants in the same booking. This is one of the most practical ways to continue the onboarding flow after creating a managed booking.
You can share the booking details through whichever channel is most convenient, such as WhatsApp, email, or another direct communication method. After opening the link, customers can review the booking, continue their registration, and complete any required paperwork or payment steps.
This is especially useful when:
- Multiple participants need to register through the same booking
- You want to let customers complete their own details after the booking has been created
- You want to continue the booking flow without having to fill everything in on behalf of the customer